
The Build
- Camper Dreamin'
- Mar 15, 2019
- 3 min read
Updated: Oct 11, 2019
It seems appropriate that our first blog post be about the van build as Yosemite marks the start of the Camper Dreamin' story. Actually, the story goes way back, when the idea of owning our camper van seemed like a pipe dream. I spent many years filling a Pinterest board named 'Camper Dreamin' (now you know where the name came from) with pictures of beautiful vans and inspiring ideas, never really thinking we'd go out and build one.
Then in 2016 we started climbing. We found ourselves camping most weekends, pitching our tent after a long day on the rock, only to wake up the next morning and take it back down again. Suddenly owning our own camper moved from 'pipe dream' to 'total necessity', so we decided to just get on and do it.

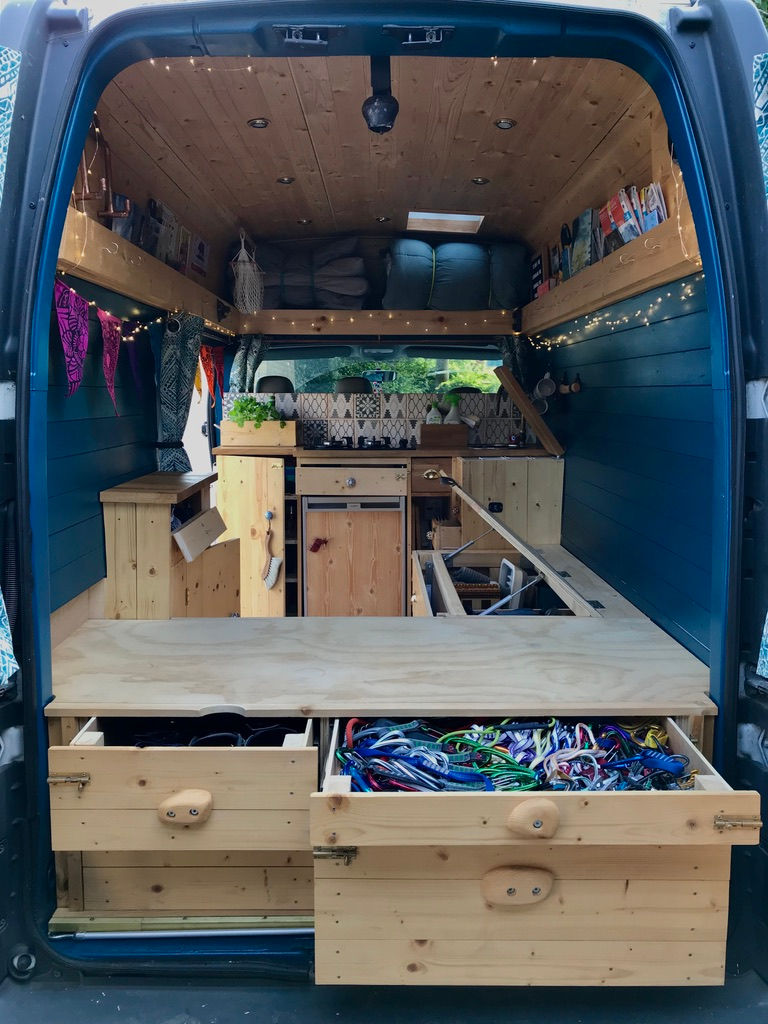
We started out with the mindset of keeping it basic and completely practical. We wanted tons of storage, a decent fridge and a comfortable place to sleep. We didn't want an internal stove ('we'd never use it'), we didn't want a sink ('a waste of space') and we didn't need it to look pretty ('we're real adventurers') but as the van evolved so did our way of thinking, and as our way of thinking evolved, our vision completely changed. We ended up with something which is both completely practical and, in our eyes, really quite pretty.
It took us 7 months from start to finish. We probably could have done it quicker if we hadn't spent so many weekends taking the van out climbing and it would have been a lot slower if we hadn't committed to working so many evenings and giving up so many weekends. There were tears, there was laughter, there was frustration and I can't count the number of times we said 'never again!' But amongst the arguments and the moments where we felt like giving up we had the glorious victories, the moments when we popped a bottle of beer and celebrated the next step completed.


We often get asked if we had carpentry experience prior to the build. We had none. I (Izzy) am blessed with a practical husband who is happy to spend a lot of time on You Tube working things out and we are both willing to take risks and give things which may feel out of our depth a good go. It is safe to say we completely 'winged it'. We had a less than basic floor plan and despite very good intentions of 'measuring twice, cutting once', we rarely did which is why we have an endless source of off cuts for our campfires! BUT... it worked. The van evolved easily as we weren't hell bent on following plans, and she miraculously came together.
A VERY rough and basic step by step of our process:
1. Gut and clean van, grind and remove any rust, apply rust treatment.
2. Install skylight and windows.
3. Glue wooden batons to the ceiling and walls so we can screw in cladding at a later stage.
4. Fit solar panel and wiring for electrics.
5. Insulate. The most boring and never-ending step ever! We used foil bubble wrap for the base, wool and recycled bottle insulation to plug gaps, celotex for the big areas and then covered everything with a waterproof membrane.
6. Clad ceilings, walls and shelf.
7. Flooring.
8. Then it was time for the most satisfying part, building the storage, bed and kitchen.
9. Installing gas hob and heater.
10. Finishing touches.
What would we change if we were to do the build again? Well, we'd put more insulation in the floor as this is where we lose most of our heat in the winter. We'd also minimise our expectations. We always expected to achieve more than we ever did in a day. This meant wood would sit in the garage unused and get warped in the summer heat before we could get back building again. We wasted a lot of materials (and money) this way. I mentioned the endless source of wood for campfires right? But all in all there isn't that much we'd change. And yes, like every van builder, we are always dreaming and planning the next project. Who knows what's around the next corner?

To see our building process from start to finish visit our instagram page.


Comments